1. Applying a texture to a whole blockTo apply a texture to a block (every face of a block) first of all select the block, then open the face edit sheet as shown: 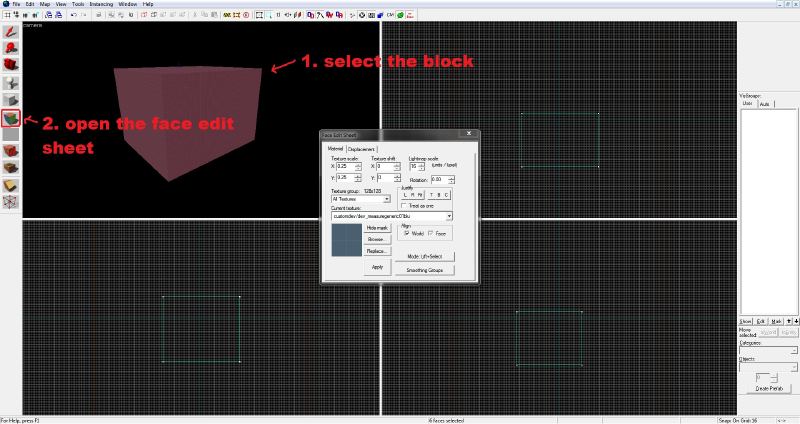 This window gives you lots of information, but a lot of it isn't needed for basic dev textured maps. To change the texture of the block, click browse to bring up a window of all the textures available to you (all of the hl2 ones will also be there if you have it installed). Next (since I'm going to be using dev textures, type 'dev/' in the filter: 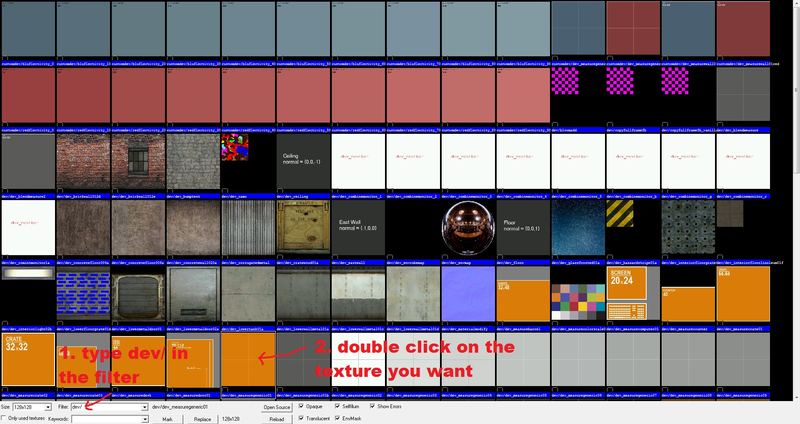 In this example, I'm going to be using the dev/dev_measuregeneric01 texture, so go ahead and double click it. Now with the texture you want shown, click Apply and close the face edit sheet.  2. Applying a texture to a face 2. Applying a texture to a faceTo apply a texture to a single face of a block, first of all without the block selected, open the face edit sheet, click browse, and double click the texture you want. Now the texture you want to apply should be shown on the face edit sheet. To apply this texture to a face of a block, simply right click on the required face. 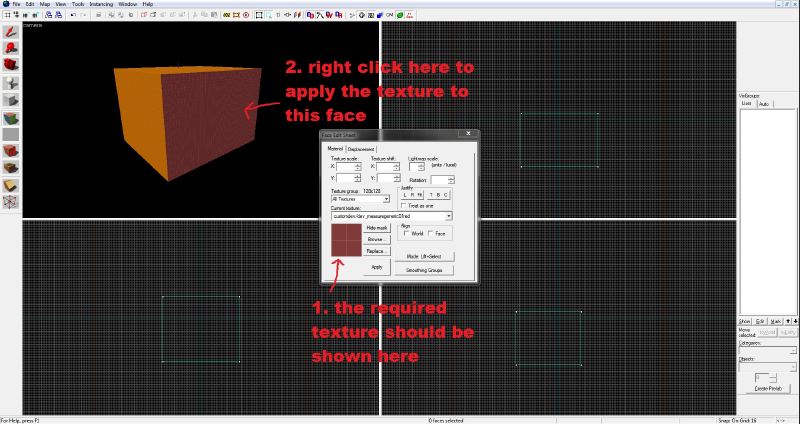 Remember, there is no need to press apply. With the selected texture on the required face, you can go and close the face edit sheet. One other thing to remember, if you want to apply a texture to multiple blocks, select the blocks by holding CTRL then follow the steps to apply it to a whole block.
|